We all love to play games on our systems. Most of us, the game lovers, have game client libraries on our systems. If you are among one of those game lovers and your Steam client is not opening on Windows 10. Else, getting closed just after starting then it can be infuriating for you. And you might be searching for a solution to make it work for you.
The reason for it can be anything. In that case, this post is particularly for you. In this, I’m going to share some solutions, through which you can make your Steam client work. And consequently, you’ll be able to enjoy games again.
So, the list of solutions on the issue of how to fix Steam won’t open starts here…
Start Your PC In Safe Mode
It is well known that in Safe mode of the computer, very crucial applications can function, and by turning your PC to Safe mode might solve this problem.
In Safe Mode, if Steam works properly then by doing this, you’ll get an idea about the app which is creating the problem in Normal Mode, and then you can troubleshoot this problem by stopping that app.
If you are unaware of how to get your computer in that state, then you can follow the subsequent instructions…
- In the search bar available on the taskbar, type “System Configuration” and then press enter.
- In the dialogue box that appears, head to the “Boot” tab. In the Boot tab, under “Boot options”, check “Safe Boot” and select “Network” radio button.
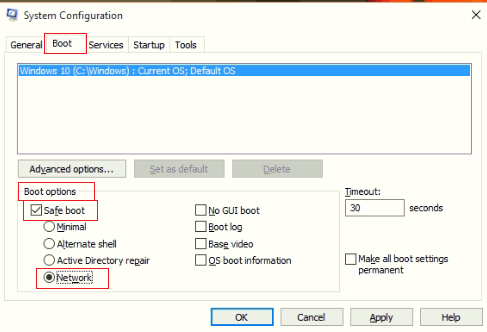
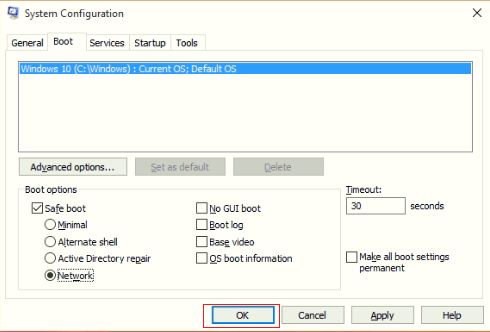
- Then click “OK”.
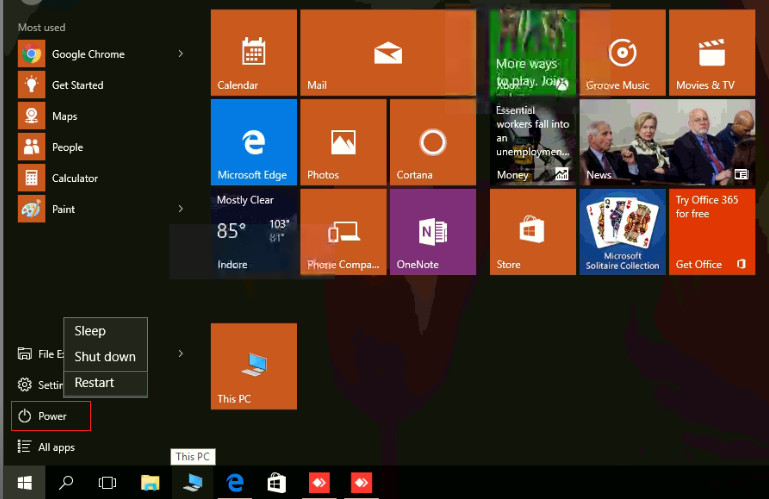
- Next, restart your computer to get your computer into Safe Mode thereby pressing on Power icon, then “Restart” button.
Note:-
It is must select the “Network” radio button under “Boot options” for Steam client to work, as it runs through the internet.
Temporarily Stop Your Antivirus Software
Many times anti-virus programs proved to be a potential enemy of various applications. It could be a possible reason in Steam’s case as well. Thus, disabling the antivirus program from third parties can help tremendously to fix this issue.
If you are unconfident, how to uninstall an anti-virus program then you can follow the following points:-
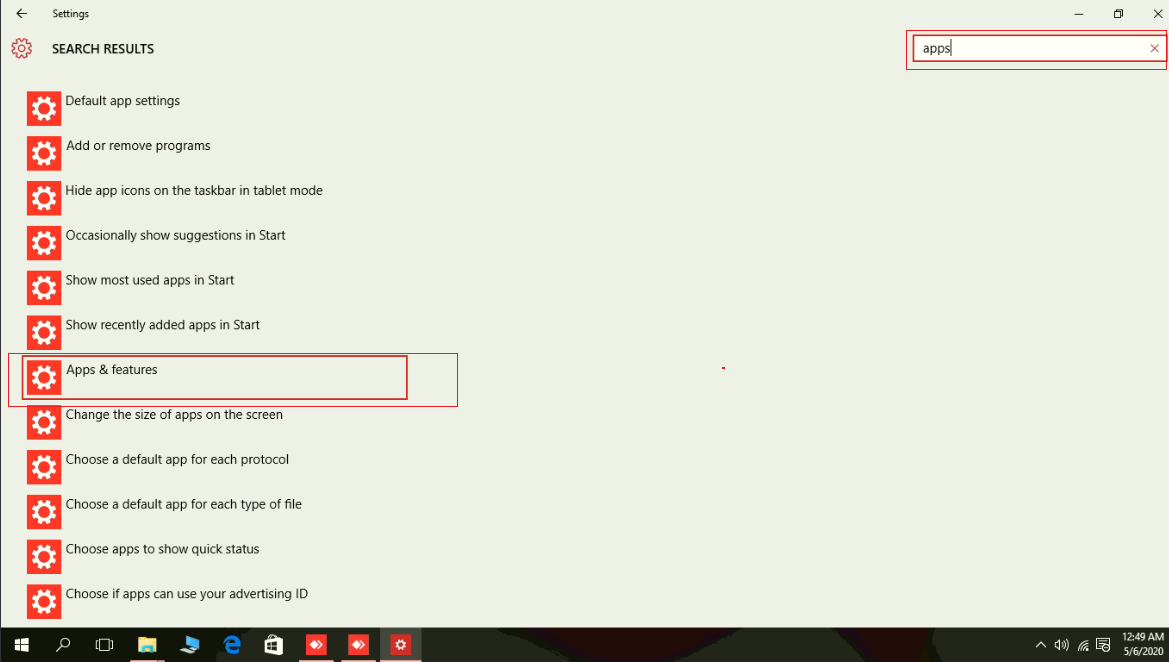
- In the search bar that is available on Taskbar, type “Settings” and then Press enter.
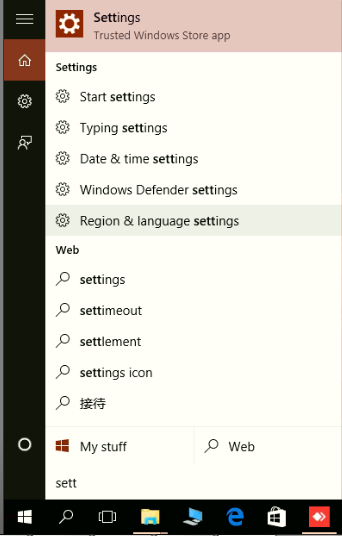
- In the Settings window, type “Apps & Features”, and click on this submenu.
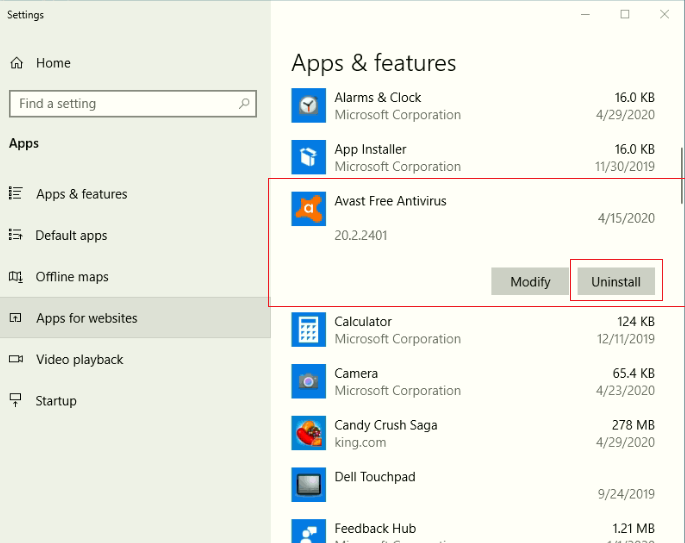
- Scroll down till you find that third-party antivirus program. Click on that antivirus program and then tap on the “Uninstall” button.
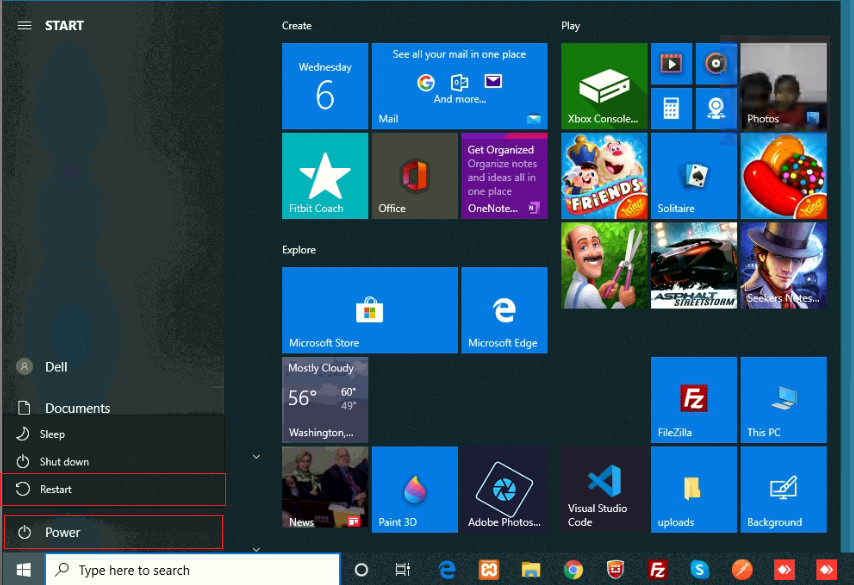
- Then to make the changes effectively work, restart your computer by clicking on the Power icon’s “Restart” option.
Note:-
Be watchful of the sites, mail, or programs you open when your antivirus program is temporarily disabled, to avoid data loss, virus protection, etc.
Using ‘steam://flushconfig’ command
The next solution is troubleshooting this problem by using ‘‘steam://flushconfig’’ command. With the help of this command, we do refresh the installation process of this application.
Here you can use this command by performing the below-mentioned points and can make your Steam client work.
- In the search bar that is present on the Taskbar, type “Run” and then press enter. In the Run dialogue box, type the command ‘‘steam://flushconfig’’ and then click “OK.”
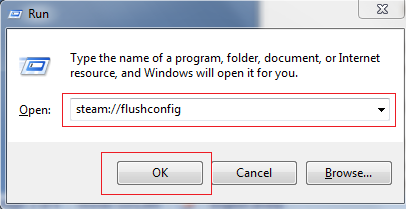
- After pressing “OK”, you’ll see a dialogue box from Steam, asking to clear local download cache which might be creating the problem. Now, press “OK”.

- After that, start your Steam client and check if it is working well.
- Fix Windows 10 Start Menu Not Working Issue
- How to Use Facetime on Windows 10 PC
- Gameloop Download
Conclusion
So, if your Steam client is not opening on Windows 10 then try these solutions mentioned above in the post and make it work again for you.
