QuickTime is a file compression and media translation tool that was first created by Apple in 1991. The tool enables audio-video file sharing over the internet. The two main characteristics of the QuickTime application is its compatibility with several operating systems (such as Mac, Windows, and Linux) as well as its ability to be used to compress video files.
The application can be used to create synchronized sound, video, music, text, and graphics to any file. It is a great editing tool for multimedia files. Quicktime is also compatible with several plugins, which is used to enhance its capability.
As a multifunctional tool, the QuickTime application can be used easily to play videos, view images, play audio files, as well as create virtual reality files. QuickTime can also be used as a plugin for your web browser, whereby you can use it in the streaming of high definition files from streaming platforms.
QuickTime is compatible with other applications such as PowerPoint, HyperCard, Movie Works, and Director. One of the best utilization of the tool, however, is in the streaming of video over networks. With the use of the software, I can engage in live streaming and streaming of both radio and video programs over the internet.
With QuickTime, I can easily compress, retrieve, and change the nature of standard images. Furthermore, I can also apply these functions to both audio, video, and film files. QuickTime is a very versatile tool that allows me to edit and change several multimedia contents. Furthermore, the tool also makes it possible for Virtual reality images to be created. With QuickTime application, I can create virtual walk-throughs related to building structures and other three-dimensional structures.
How to install QuickTime on your Windows 10 PC?
Though QuickTime was created exclusively for the Mac operating system, the application has now been extended to other operating systems as well. However, QuickTime is no longer supported by Apple; I am still able to install the app on the Windows 10 operating system and older versions.
I have prepared a step-by-step guide that will work you through the essential steps needed to install the application on your Windows 10 PC.
How to download QuickTime on your Windows 10 PC?
To download the QuickTime application, visit the Windows QuickTime official download page. On this page, you can quickly get the latest edition of the QuickTime software that is available for the Windows 10 platform.
It is to be noted that before downloading or installing the application on your Windows, you should ensure that you read all necessary information and notes.
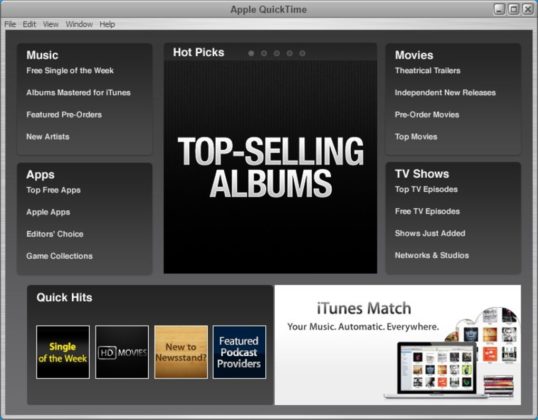
Downloading QuickTime for the Windows 10 operating System
- To download the application on your Windows 10 device, you would have to get the app from the support Apple website. Whenever I do this, I click on the download icon to begin downloading the installer for QuickTime.

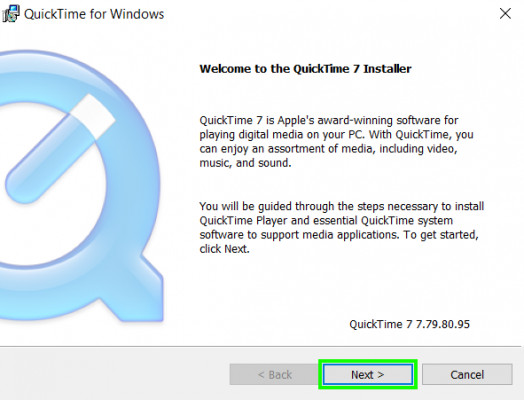
- During the process of installation, QuickTime Essentials and QuickTime Player are chosen by default. Furthermore, your three alternative features of Java for QuickTime, Picture Viewer for QuickTime, and Web Plug-in for QuickTime are not selected.
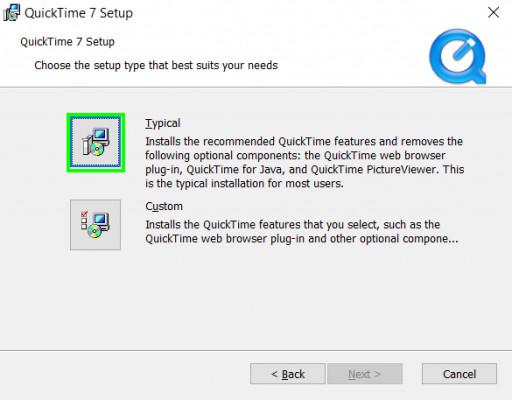
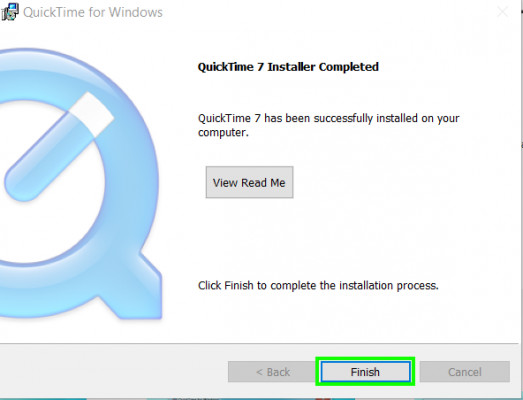
- Several browsing platforms have stopped supporting these plugins. Browsers such as Edge, Firefox, and Chrome have stopped supporting the plugins.
- However, for users like myself that need the QuickTime tool for video editing tools and all other software that needs it, I set up the QuickTime app Essentials. In this case, I usually take off the checkmark out of the QuickTime Player because it is not required.
- Snapchat For PC
- Best Free VPN for PC
- Access Windows 10 Startup Folder
- Download Gameloop
How to use QuickTime on Windows 10 PC
I use my QuickTime for various tasks. For me, the QuickTime tool is more than a video-playback application. So I use the tool to edit videos; I also trim my video files with it. I use the QuickTime tool to merge multiple files as well as the recording of videos and audios. One great thing that I have learned working with QuickTime is that you can use the tool for video files just as much for audio files.
As soon as you have installed your QuickTime tool on your Windows 10 PC, you can now use the tool in various ways.
1). Play audio and video files
One of the primary functions of the tool is to play both audio and video files. I use my QuickTime application to play both audio and video files of various formats and extensions. This is because the tool has been developed as a multifunctional multimedia tool, and hence it is incredibly versatile
2). Trimming of both audio and video files
I typically use my QuickTime application on my Windows PC to trim both audio and video files. I do this by double-clicking on any files, whether audio or video and selecting to get the file open with QuickTime.
Soon as this audio or video is open in the QuickTime tool, select edit and choose trim. After this, a primary trimming interface appears. Click the bars and hold them while dragging them to select the part of the file that you need. You can choose then trim. The unwanted parts will be removed. Then save the file.

3). Merging of multiple files
I also use QuickTime to join several video files together. This is done by opening the file with QuickTime. Then, drag a new file, and drop-in onto the QuickTime interface. This will show after the original file. You can rearrange the order of the videos by dragging and dropping. Open a video clip to trim it and take out unwanted content. This same process can be used to merge audio files. You can also overlay audio on a video. This will get the audio playing the same time as the video to form one single video file. I usually use this function to add background music to most of my videos. After merging files, you can then save.
4). Split and rearrange files
I also use my QuickTime tool to rearrange my media files. I begin by opening the file with QuickTime and drag the play head located on the media bar to somewhere on the file. And then select edit and then split the clip. This simple function proceeds to cut the selected clip into two halves. I keep on repeating this same function to create many smaller clips. Then I drag the new video clips around to arrange them the way I want.
5). Recording audios and videos with QuickTime
The QuickTime tool also comes equipped with in-built recording features. This makes it easy for me to quickly record both audio and video files on my Windows 10 PC. I usually use several sources to perform the recording. I could use the audio and webcam of my PC to record a standard video. Furthermore, I also use it to record my desktop to produce a screencast. However, to get this done, you will have to open the QuickTime application.
Go to the File menu to access the recording features. Choose the New Movie Recording to record a new video. Similarly, to record a new audio file, I choose the New Audio Recording button. In the same way, the New Screen Recording is used to record a PC screen.
To begin recording, when you start a new recording, choose the source of your video and audio file. You can then select the red button for recording. When you are done with the recording process, click the stop button. You shall then see a preview of your video on your screen. I still apply the trim feature on QuickTime to edit the recorded video. In the end, I will then save the video.
6). Using QuickTime to shrink and transcode files
I also use the application to perform some fundamental transcoding tasks. This feature helps in shrinking a file to a more compact size. This small size aids in quickly emailing files or uploading them somewhere where they would not consume much space, especially on portable devices. Furthermore, you could use this feature to remove a video from a media file leaving only the audio file. The audio file can now be saved as a new file.
The way I do this is that I select the media file, open it, and click on the File menu. I then make use of several alternatives under the Export command to choose the needed level of quality. I also export this video directly to iTunes to give me the required level of quality. From my iTunes app, the video can now be transferred to any mobile device to be played as an audio file.
7). QuickTime as a tool for Virtual Reality
I also make use of the QuickTime tool to create Virtual Reality images. You may call this immersive imaging. But I refer to it as interactive photography. However, we all know about technology as Virtual Reality. With the QuickTime VR tool, I can produce panoramic movies. These movies can easily be navigated just by using a keyboard and a mouse. To do this, you will have to install the QuickTime VR authoring studio, which allows for the creation of Virtual reality images.
8). Video Editing tool
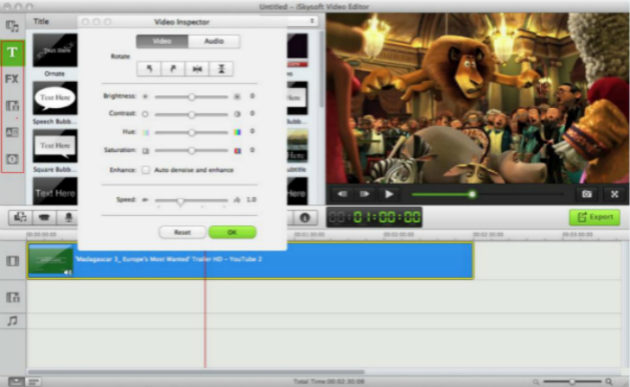
The QuickTime application can also be used as a video editing tool. You can add or remove elements from a specific video file. I use the tool to add titles and subtitles to my video files. Furthermore, I also add audio and apply various filters to enhance my videos.
If you enjoyed this post about how you can use Quicktime on your Windows 10 PC and you want to see more in the future just go ahead and subscribe to our blog so you won’t miss a single one. We post daily guides on solving your tech problems. Also, don’t forget to share it with your friends so that they can as well learn some new things as well.
Have any questions? Just simply go ahead and comment on them below and we will try to get to you as soon as possible, don’t worry your question will be answered.